As a business owner, I know the importance of driving traffic to a website. It is especially important if you are running an E-commerce site so that you can continue to make sales and grow your business!
One way that I continue to see countless results, both with my own business and my clients, is through using Pinterest to drive traffic to your Ecommerce site.
When people tend to think of Pinterest, they most often associate it with personal use. For pinning recipes, cute clothes, and decor ideas. However, Pinterest can be so much more than that – especially for an E-commerce business! Pinterest can help Drive Traffic to Your Ecommerce Site and the content that is placed on Pinterest can have a much longer life span then those places on other social media sites.
While Facebook and Instagram have a very short life span (meaning they will only help drive traffic to your website for a short amount of time), Pinterest can continue to drive traffic days, months and even years after you originally pinned your content! Pretty cool, right?!
But that isn’t all!
What makes Pinterest even better for E-commerce businesses is that people are on Pinterest to find and purchase products. Don’t believe me? Here are just a few stats to back that theory up:
- 87% of Pinners have purchased a product because of Pinterest
- Everyday nearly 2 Million people pin product rich pins
- Pinterest is growing at a rate of about 40% per year – much fast than Facebook or Instagram!
- 40% of users have a household income of $100,ooo+
That all sounds pretty great right? Wouldn’t you love to get your products seen (and purchased) by those pinners?! Of course, you would! In order to have success with Pinterest, and ultimately drive more sales to your E-commerce business, you will need to follow the below steps.
*This post contains affiliate links, which means I may receive a small commission, at no cost to you, if you make a purchase through a link. You can find my full disclaimer here.
1. Set up your profile on Pinterest
I just completed a detailed blog all about how to do this so you can check it out here! Or keep reading and I will link everything you need at the bottom of this page, too!
2. Take quality pictures
Pinners are more likely to react to pictures that are taken with good lightening, clean backgrounds, and ones where it can easily be seen what the product is. This step can make all the difference on whether or not your pins will go viral or if they won’t. If you are not savvy with a camera, I recommend finding either a local photographer to help you out or finding someone (who already can take great pictures) to exchange your products for their pictures of them.
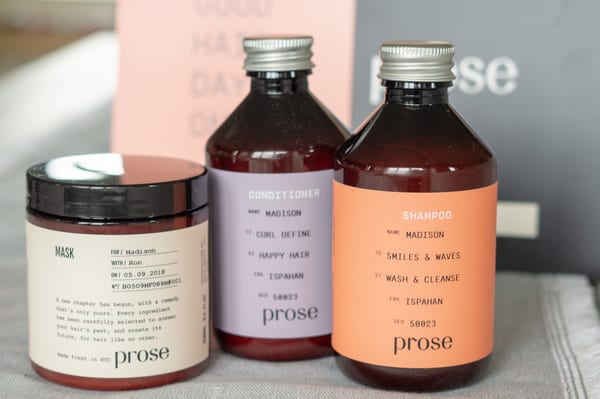
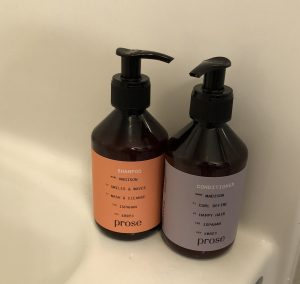
Spending the extra money and time in this step is EXTREMELY wise! Let’s take a look at an example of product photography. The two below pictures are of the same product. Now, if you saw these pictures as pins on Pinterest, which one would you be more attracted to? Probably the one that is light, bright and shows off the products in the best way possible. I wouldn’t even consider looking at the bottom picture, even through it is a great product, all because of the way it was displayed.


3. Now that you have great pictures, you need great Pin descriptions!
If you have already checked out the blog about how to get started on Pinterest, you know the importance of keywords in board descriptions. Now, we need to be able to add similar keywords into the Pin description. Pin descriptions are super important in terms of having your pin appear as a search result on Pinterest because they help Pinterest understand what your pin is about (and when to show it!)
Your descriptions should be very specific to the product that you are pinning and not just a random string of keywords. For example, for the product picture above, here is my description:
Prose Personalized Haircare Products | Prose Shampoo and Conditioner was the best addition to my haircare routine, it’s made my blonde hair look amazing!
These were the keywords that I wanted to make sure to include:
- Prose
- Personalized Haircare
- Haircare products
- Shampoo and Conditioner
- Haircare routine
- blonde hair
I was able to include everything I wanted, without just making a long line of the keywords.

4. Pin often and regularly. I recommend 20-60 pins per day!
Now, 20-60 pins might sound like a lot but it is not only your products/content! Typically I follow the 80/20 rule – which means sharing 80% other people’s content and 20% yours. Now, if you have thousands of products then you certainly don’t need to follow that rule but I am guessing that is not the case for most of us.
If you were to manually pin 20-60 pins per day, you might never leave your desk (which isn’t something I want for you!) My absolute FAVORITE way to get this many pins in (and at the best times) is to utilize a scheduling tool: Tailwind! With Tailwind, you are able to schedule out content in advance. Their SmartSchedule looks at your data and makes sure that your content is published at the best times to gain maximum engagement – and it does this with just a click of a button (so no need to try and comprehend all the data yourself!)
By using their intuitive dashboard, it could save you countless hours over manual pinning so it is worth every penny – in my opinion! If you want to know more about how exactly to use Tailwind, I have a video tutorial for you here. Or if you are ready to dive in (their customer success team is the BEST if you ever have any questions) then just click here!
5. Join Group Boards and Tailwind Tribes
Joining group boards and Tailwind Tribes can really help get your content seen! I love utilizing the Tribes feature because it helps me quickly find relevant content that I want to pin, while getting my own content out into the Pinterest feed.
With over 4,000 Tribes to choose from, you are certain to find the perfect one for your business. Allowing you to easily meet new influences and work together to activate your community and ultimately grow your reach!
You can find tribes by going to your Tailwind profile, and selecting the “Tribes” button from the menu on the left hand side of the screen. Once inside the tribes feature, you can manage your current tribes or find new tribes to join.

I recommend joining any tribes that are relevant to your niche and what you will be sharing on your profile. Once you have joined the Tribes that you want, you can add your content to them. Do this by using the Tailwind browser extension, selecting the pin you want, and then selected “Add to Tribes” as seen on the pin below. Once you select that button, you can then choose which tribes you would like to add the pin to.


There you have it, How to Drive Traffic to Your Ecommerce Site using Pinterest!
Once you complete these steps, remember you have to remain consistent to remain relevant on Pinterest. If you need more help on setting up your Pinterest account, or if you would like someone to simply run it for you, contact me here.
Below are the resources that were discussed earlier in the post:
How to get started on Pinterest
Use the pin below to save this post and refer back to it in the future! 


Leave a Reply